
Databases
Databases
A database is a table that lives inside a page, where every column has a type: text, numbers, dates, options, people, checkboxes and more. Use one to track tasks, clients, expenses, grades or anything else you'd otherwise keep in a spreadsheet, and look at the same rows as a table, a kanban, a calendar, a gallery, a chart or a timeline.
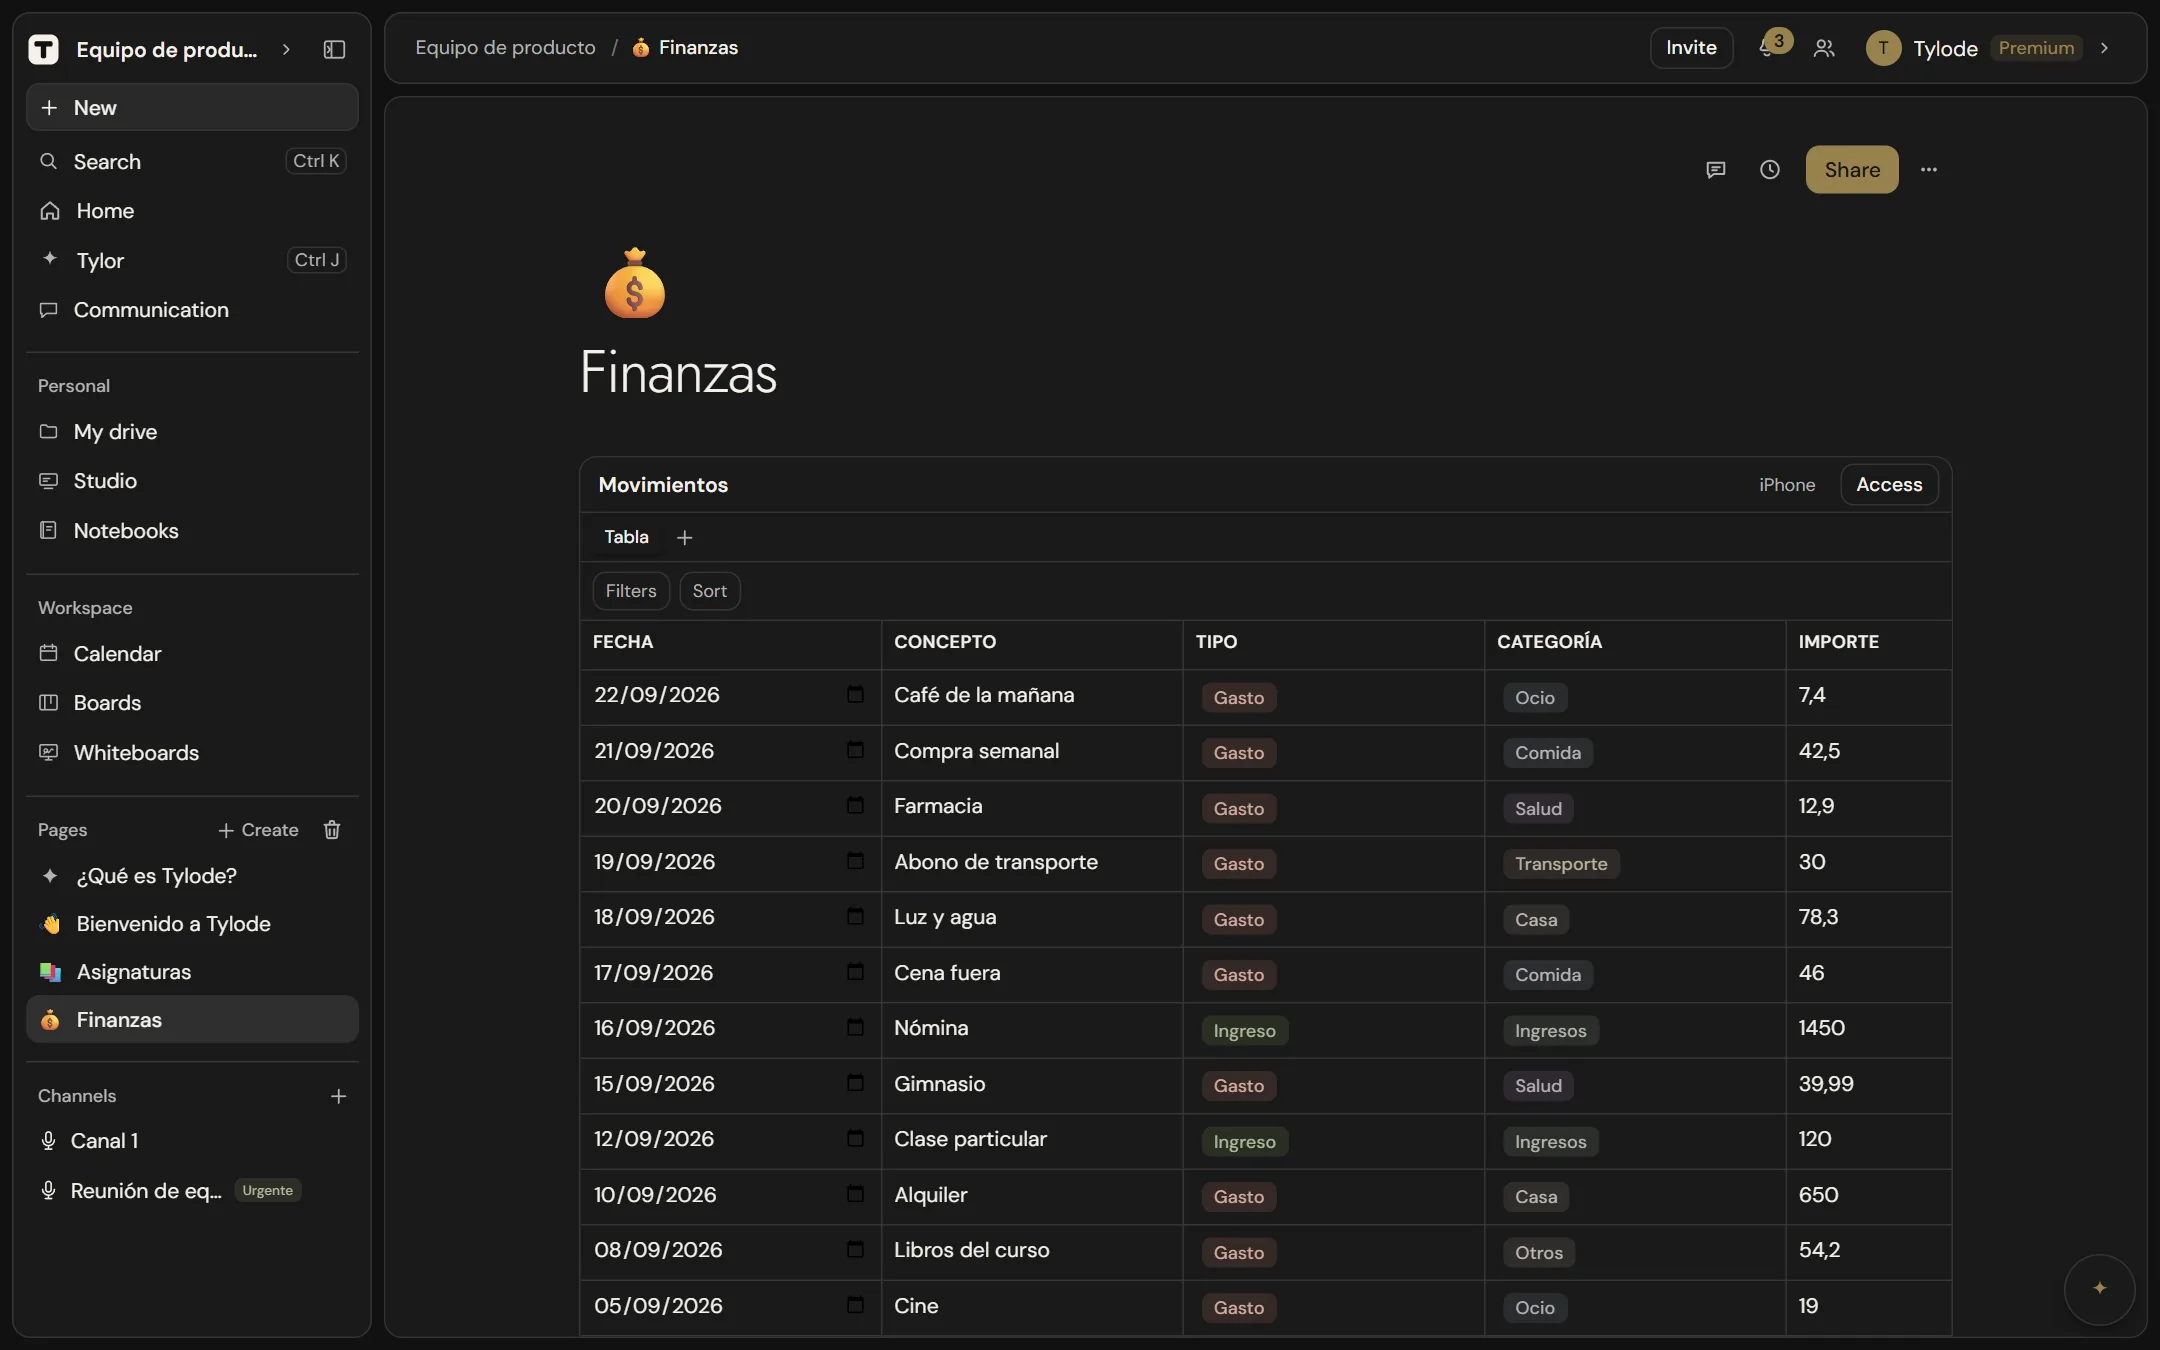
What a database is
Each database has:
- A name, shown at the top of the block. Click it to rename the database.
- Columns, each with a name and a type. The type decides what a cell holds and how you edit it. See Column types.
- Rows, one per item you track.
- Views, shown as tabs under the name. Every database starts with a Table view, and you can add Kanban, Calendar, Gallery, Chart and Timeline views on top. See Views, filters and sorting.
If you only want to see the rows, without the database bar, click Hide options in the header: just the view stays, with the name above it. The ⋯ that appears next to the name on hover (Show database options) brings everything back. Galleries created as a magnet start this way.
A database belongs to the page where it was created. There's no separate list of databases in the sidebar: you reach it by opening its page.
Create a database
There are four ways to get a database.
From a page with /Database
- Open a page and put the cursor on an empty line.
- Type
/and choose Database (in the Data group, described as "Table with typed columns"). Typing/dbor/tablefinds it too. On a touch screen you can also use the floating + button (Insert element). - A new database appears with a text column for the name, a select column for the status and a Table view. Add rows and columns from there.
Each Database block creates a brand-new database. You can't insert an existing database into a second page; to show its data somewhere else, use Studio (see Use the data elsewhere).
As a magnet on a page
On a page, click + Magnet and choose Database (a new table, with its views) or Page gallery (cards with a cover that open as a page). The database appears in its own magnet, which you can move and resize around the page. The gallery starts with the columns Name, Tags, Target date, Link, Created and Favorite, and without the options bar. See Dashboard pages.
Import a CSV file
On Home, click Import (under the greeting) and drop one or more .csv files (or a Notion export). Each CSV becomes a page with a database inside. Tylode detects the column types for you: the first column is text, and the rest become checkbox, number, date, URL, select or text depending on their values. See Import from Notion, Markdown and CSV.
Start from a template
Templates in the sidebar lists the Tylode templates (course organizer, CRM, bug tracker, invoicing and many more). Click Use and you get pages with databases already set up, sample rows and views. On the Free plan, template columns that need Pro (formulas, relations and rollups) are left out and you'll see a notice. See Templates.
Rows and columns
In the Table view:
| To… | Do this |
|---|---|
| Add a row | Click New row under the table. New rows are added at the end. |
| Delete a row | Hover over the row (on touch screens the trash icon is always visible), click the trash icon at its right end (Delete row), then click it again to confirm. |
| Add a column | Click + (Add column) at the right of the headers. The new column is a Text column called "Column". |
| Rename a column | Click its name in the header, type, and click outside. |
| Change a column's type | Pick a type from the small menu next to the column name. |
| Delete a column | Click the trash icon in the header (Delete column), then click it again to confirm. On touch screens, the trash icon appears when you tap the column's name. |
Deleting a row or a column is permanent: it doesn't go to the Trash.
The title column
The first Text column acts as the row's title. It's the name you see on calendar entries, gallery cards, timeline bars and in relation cells of other databases. If a row's title is empty, it shows as "Untitled". Keep a Text column first and put a meaningful name in it.
Open a row as a page
Every row can be opened big, as a page: with a cover, its properties at the top and, below, free text as long as you like.
- From a gallery: click the card.
- From a table: hover over the row's first cell and click Open.
In the open row:
| To… | Do this |
|---|---|
| Add a cover | Add cover picks one of the colors and gradients; Upload image uses your own photo. With a cover, hover over it to Change cover or Remove. |
| Change the title | Type over the title (it's the first Text column). |
| Edit a property | Click its value, just like in the table. |
| Add, rename or delete properties | Add a property creates a new column. Type over a property's name to rename it; on hover you get the type menu and the trash icon. |
| Write | Below the properties there's an editor like the one in pages: headings, lists, photos, tables and, with /, databases, boards, whiteboards or polls too. It saves on its own when you stop typing. |
| Use tabs | Click + Tab to split the text into tabs ("Content", "Summary", "Quiz"…). Each one has its own text. Double-click a tab to rename it; the ✕ deletes it (if it has text, it asks for a second tap). With a single tab, the bar disappears. |
| Mark as favorite | The ⭐ at the top right, if the database has a Favorite column (fridge galleries come with one). |
| Delete the row | The trash icon at the top right, and again to confirm (Delete?). |
| Close | The ✕, Esc or a click outside. |
Edit cells
Click a cell and type or choose a value. How each type is edited (date picker, checkbox, option list, member list…) is explained in Column types.
- Text, number, URL and phone cells are saved when you leave the cell.
- Dates, checkboxes, options, people and relations are saved as soon as you pick them.
- Formula, rollup, Created by and Last edited cells are calculated and can't be edited.
When several people edit at once
Your changes are saved automatically, but other people's edits to a database don't appear on your screen while you have the page open. Reload the page to see the latest data, especially before making many changes to a database you share with others.
Who can see a database
A database is shared with the whole workspace:
- Owners, admins and members can view and edit it.
- Read-only members can view it but not change it.
Databases don't have an access setting of their own. Sharing the page controls who can open that page, but workspace members can still reach the database's data from Studio and the API. If some data must stay private, keep it in a separate workspace. See Workspace roles and access.
Limits by plan
The number of databases per workspace depends on your effective plan, the lower of your own plan and the workspace's plan:
| Free | Pro | Premium | |
|---|---|---|---|
| Databases per workspace | 2 | 5 | Unlimited |
| Formula, relation and rollup columns | – | ✓ | ✓ |
- The limit counts every database in the workspace, whoever created it. Databases created by CSV imports count too.
- Templates always create their databases, even at the limit, but those databases count afterwards.
- When you reach the limit, Tylode doesn't create the database (or leave an empty block on the page) and explains it in a window with See plans. Pages are unlimited on every plan.
- Removing a Database block from a page doesn't delete the database. It's deleted along with its page when that page is deleted forever from the Trash, which frees up the slot.
Boards and whiteboards have their own, separate limits of the same size. See Limits and what happens when you reach them.
Use the data elsewhere
- Studio: in a presentation or design, charts and tables have a Bring from Tylode option that fills them with a database's data, and Refresh data updates them later. You can also embed a database live (read-only) from Data → Boards and databases. See Studio.
- A design for every row: click Batch in the database header, choose the format (a post, a story, a certificate…) and which rows, and the Studio opens with a design already connected that shows your data. See Batch.
- Page exports: exporting the page to PDF prints the whole table. See Export pages.
- API Pro: list a workspace's databases, read their rows and add new rows with a personal access token. See Databases API.
- Apple Shortcuts: add a row from your iPhone in one tap (for example, log an expense). See Recipes.
Global search doesn't search inside database rows. Use the view's Filters to find rows instead.
Add notes from your iPhone (or anywhere)
With iPhone, in the database header, you create a link that adds rows without opening Tylode: from an iPhone Shortcut (and with Siri, a widget or the Action button), from Android with HTTP Shortcuts, from Zapier or from anything that can send text to a link.
- Check the columns you want the Shortcut to ask for each time, for example description, amount and category. The others can have a fixed value: an option of a select column, a checked checkbox or today's date.
- Click Create link. The link is only shown at that moment: copy it or scan the QR code with your iPhone.
- On your iPhone, tap Copy and then Add Shortcut, and paste the link when asked. Say “Hey Siri, note in Tylode”: it asks one question per checked column (for select columns you pick from a list) and adds the row.
If you open iPhone on the iPhone itself (or an iPad), you don't need the QR code: after Create link, tap Add the shortcut to iPhone. The link is copied and the Shortcut opens so you can add it; when it asks for the link, paste it.
The Shortcut is the same for all your databases: if you add or remove columns, create another link with the ones you want and paste it into the Shortcut.
For Android, Zapier or other tools: a GET to the link with ?campos returns the questions as JSON, and a POST with the field respuestas (in that order, separated by ||) adds the row. You can also send just a text, which goes to the first text column.
The link can only add rows to that database and see the names of the columns it asks for: no rows. It writes as you, and only while you can edit the database. If you lose it or stop using it, revoke it in the same window: shortcuts that use it stop working. It accepts up to 30 notes per minute and 5,000 characters per answer.