
Modules
Whiteboards
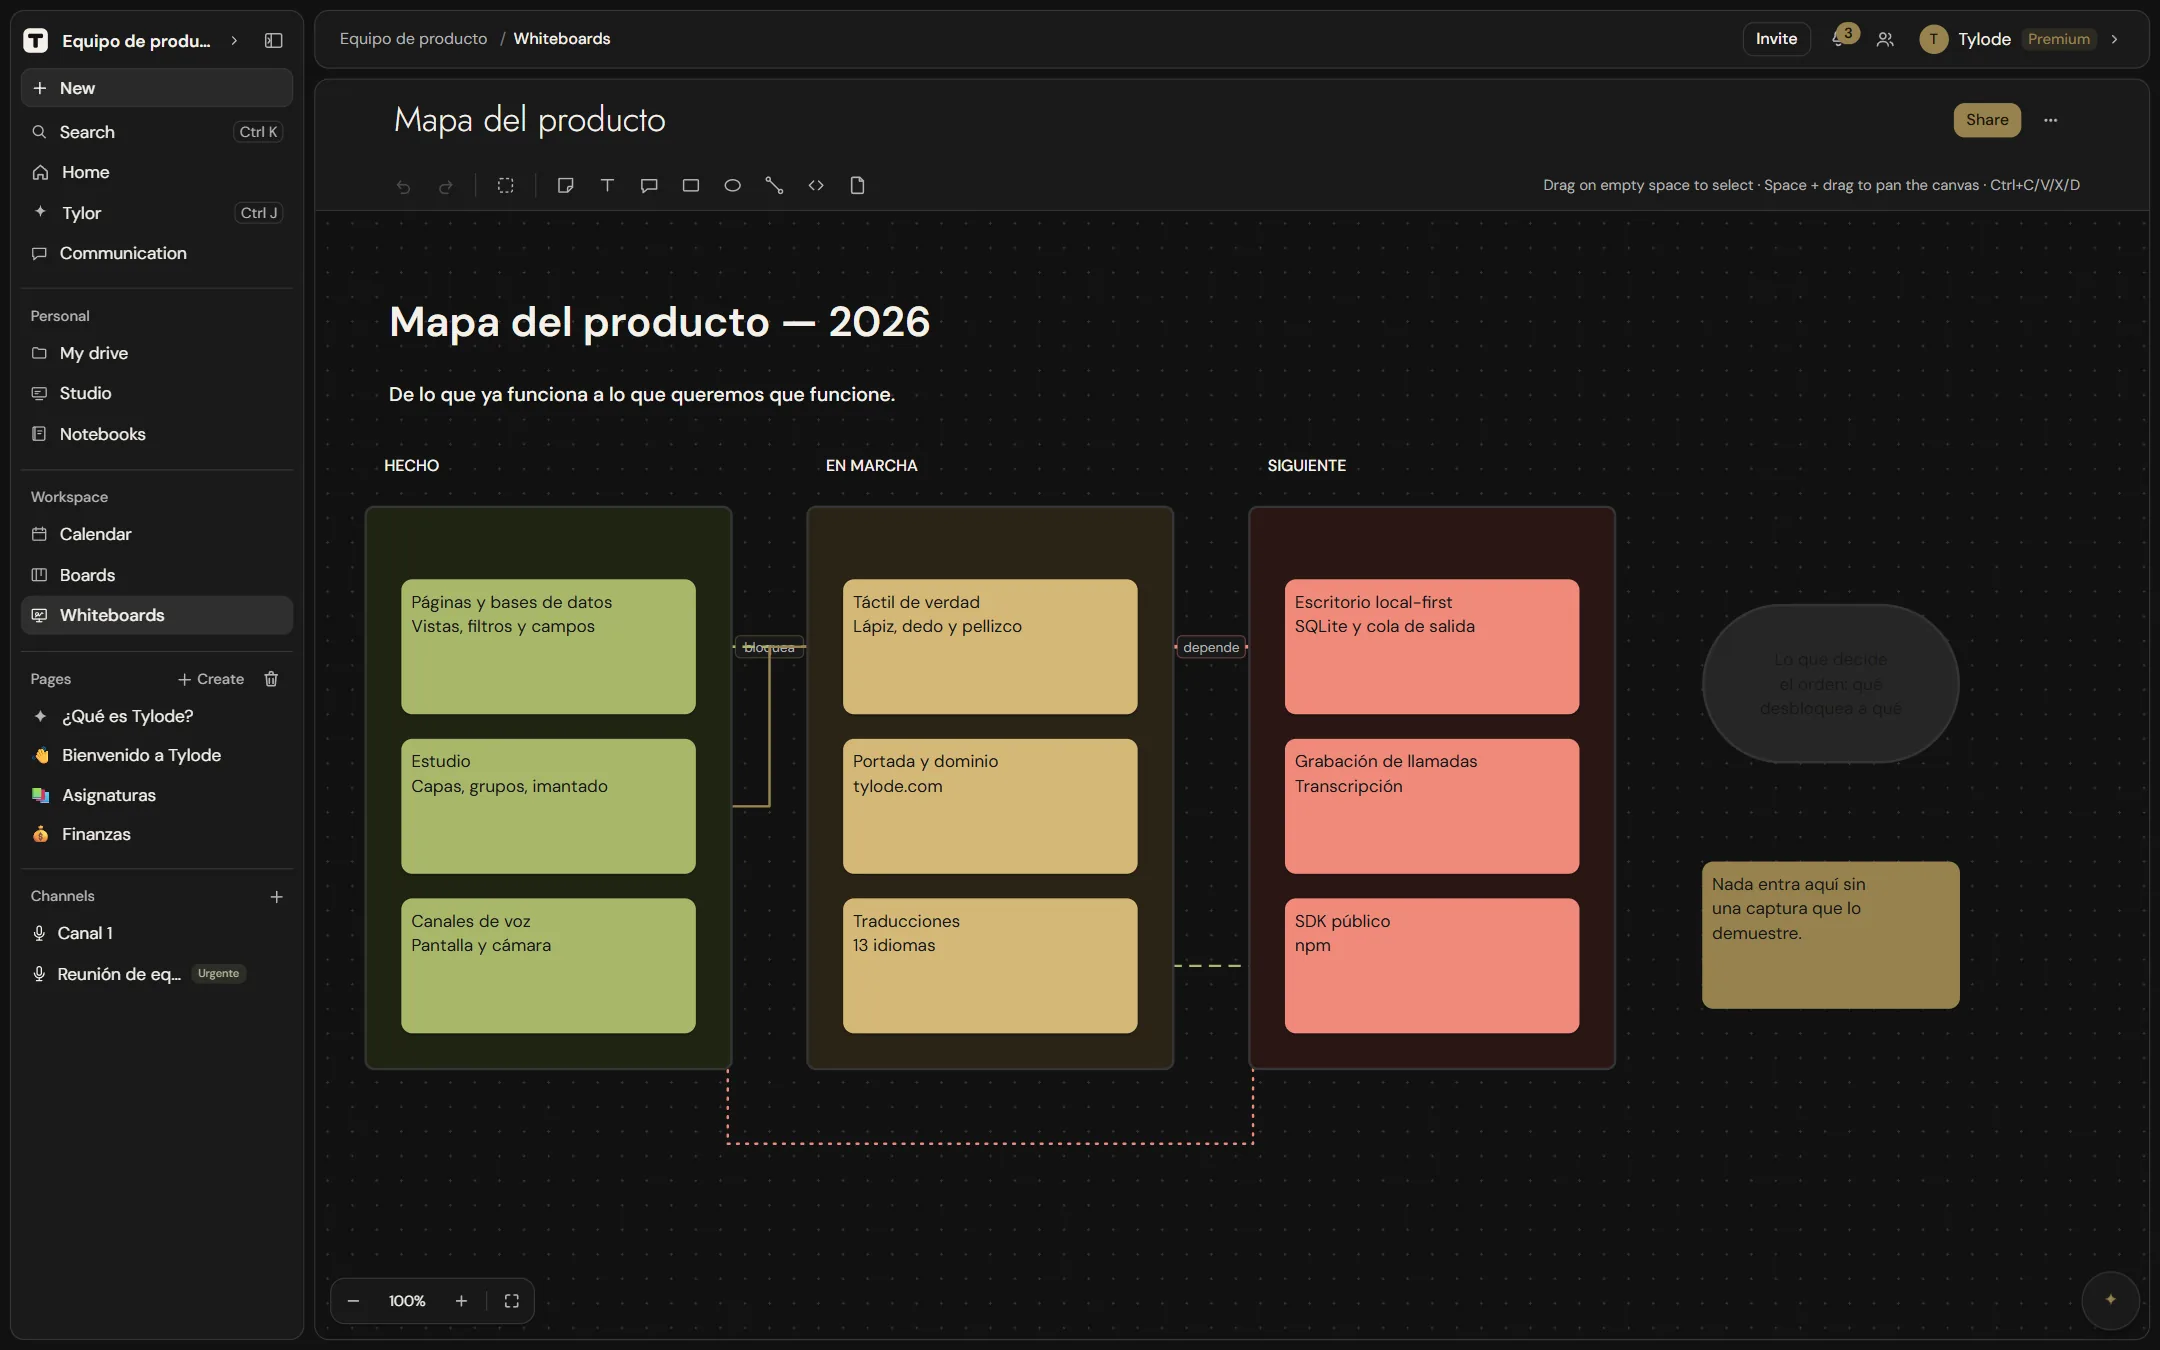
A whiteboard is an infinite canvas for thinking visually with your team: sticky notes, text, shapes joined by connectors, comments, files and cards that open your boards, calendar or voice channels. Everyone sees changes as they happen.
On a phone, a whiteboard opens for viewing: you can scroll and zoom, but there's no toolbar. Tap Edit to unlock it fully and Done to go back to viewing.
Create, rename and delete whiteboards
Open Whiteboards in the Workspace group of the sidebar to see the workspace's whiteboards.
Each whiteboard is a card with a thumbnail that shows the real layout of its notes and shapes, in their colors, plus its name and how many items it has (for example, "12 items", or "Empty"). Click a card to open the whiteboard. The Templates button at the top right opens the whiteboard templates. If there are no whiteboards yet, the page says No whiteboards yet and shows a New whiteboard button.
Create a whiteboard
Click New whiteboard. It's created as "Untitled whiteboard" and opens straight away. Click the name at the top to rename it.
You can also create one from inside a page: type /, choose Whiteboard and click Create new whiteboard (see Whiteboards in pages). To start from a ready-made structure (a concept map, a business model canvas…), use templates.
Rename a whiteboard
- From the whiteboard: click its name at the top and type the new one.
- From the Whiteboards list: click ⋯ on the whiteboard's card and choose Rename. Type the new name and press Enter or click outside to save; Esc cancels.
Delete a whiteboard
- In Whiteboards, click ⋯ on the whiteboard's card and choose Delete whiteboard.
- Confirm in the dialog. The whiteboard goes to the trash with everything on it.
From the trash you can restore it as it was or delete it forever. Only the person who created it and the workspace admins can delete or restore it.
Tools
The toolbar at the top of the canvas has these tools. New items appear in the middle of what you're looking at. On touch screens the buttons are larger, so they're easier to tap.
| Tool | What it adds |
|---|---|
| Sticky note | A colored note. Each new note gets one of the eight palette tones at random: apricot, pistachio, sky, wheat, peony, mint, coral or lavender. To change it, select one or more notes and click a color in the toolbar. |
| Text | A free text box with no background. |
| Comment | A comment pin with its own thread (see Comments). |
| Rectangle | A rectangle that can hold centered text. |
| Ellipse | An ellipse that can hold centered text. |
| Connect two items (click one, then the other) | A connector between two items (see Connectors). |
| Insert a Tylode object (board, whiteboard, calendar, voice channel) | A card linked to one of your Tylode objects. |
| Insert file (image, video, audio, document) | A file uploaded from your device. |
Double-click a sticky note, text box or shape to type in it. Click outside to finish.
On wide screens, when nothing is selected, the right end of the toolbar shows a short reminder of how to select, pan the canvas and copy or paste.
Comments
- Click Comment. A comment pin appears on the canvas and its thread opens.
- Type in Reply… and click Send.
Anyone with access can open the pin and reply. When the discussion is over, click Mark as resolved to remove the pin from the canvas, or Delete to delete the comment and its replies.
Connectors
- Click Connect two items (click one, then the other).
- Click the first item ("Choose the first item…") and then the second ("Now choose the second item…").
The connector follows the items when you move them. Click a connector to select it and change its style:
| Option | Choices |
|---|---|
| Connector color | A palette of colors. |
| Thickness | Several widths, in pixels. |
| Line style | Solid line, Dashed line or Dotted line. |
| Routing | Right angles, routing around shapes (the default) or Straight line from edge to edge. |
| Arrows | Start and End turn an arrowhead on or off at each end. |
| Arrow size | Several sizes, in pixels. |
| Delete connector | Removes the connector. |
With a connector selected, Delete or Backspace also removes it.
Tylode objects
Insert a Tylode object lets you pick a Board, another Whiteboard, the Calendar (the workspace calendar) or a Voice channel from the current workspace. The whiteboard shows a card with its icon and name and an Open button: it opens the board, whiteboard or calendar, and for a voice channel it joins the call. If the object is deleted later, the card says so (for example "Board deleted").
Pages can't be placed on a whiteboard. To connect a whiteboard with a page, do it the other way round: embed the whiteboard in the page.
Files
Insert file uploads an image, video, audio file or document from your device. Images and videos are shown on the canvas, videos and audio play in place, and documents appear as a file card. Files count toward the workspace's storage and your plan's maximum file size applies (see My drive).
Select, move and resize
| Action | How |
|---|---|
| Select an item | Click it. |
| Add to or remove from the selection | Hold Shift and click an item, or hold Shift while you drag a selection box. |
| Select several items | Drag on an empty part of the canvas to draw a selection box. |
| Move | Drag the selected item or items. |
| Resize | Drag the handle in the corner of the selection. With several items selected, they're resized together. |
| Delete | Press Delete or click Delete selected (or Delete # items). |
Keyboard and touch controls
Keyboard and mouse
On Mac, use Cmd wherever this table says Ctrl.
| Keys | Action |
|---|---|
| Delete / Backspace | Delete the selection or the selected connector |
| Ctrl+C | Copy |
| Ctrl+X | Cut |
| Ctrl+V | Paste |
| Ctrl+D | Duplicate |
| Ctrl+Z | Undo |
| Ctrl+Shift+Z or Ctrl+Y | Redo |
| Space + drag | Pan the canvas |
| Middle mouse button + drag | Pan the canvas |
| Mouse wheel | Zoom in and out around the pointer |
| Two fingers on a trackpad | Pan |
| Pinch on a trackpad, or Ctrl + wheel | Zoom |
| Ctrl++ / Ctrl+- | Zoom in / out |
| Ctrl+0 | Back to 100% |
| Shift+1 | Fit to content |
The Undo and Redo buttons in the toolbar do the same as the shortcuts.
Touch screens
| Gesture | Action |
|---|---|
| One finger on the background | Pan the canvas |
| Two fingers | Zoom (pinch) and pan |
| Drag an item | Move it |
| Pen on the background | Draw a selection box |
To box-select with your finger instead of panning, turn on Select with finger in the toolbar. Turn it off again to go back to panning.
Zoom and pan
The canvas has no edges: pan in any direction to make room. Zoom goes from 20% to 300%, centered on the pointer (or between your fingers), so what you're looking at stays in place. If you go past a limit, the zoom resists a little and springs back. When you open a whiteboard, the view adjusts so all of its content fits.
The zoom controls are at the bottom left of the canvas:
- − and + zoom out and in, around the center of the screen.
- The percentage shows the current zoom; click it to go back to 100%.
- Fit to content frames everything on the whiteboard. Use it if you get lost on the canvas.
With a finger, when you let go after panning, the view keeps going with the momentum and slows down gradually; tap the canvas to stop it.
Real-time collaboration
Whiteboards update live for everyone who has them open: new notes, moves, edits, connectors and comments appear without reloading. Other people's cursors aren't shown.
Export to PNG or PDF
Click ⋯ (More options) at the top right of the whiteboard, next to Access, and choose:
- Export as image downloads a PNG with everything on the whiteboard, not just what's on screen, at double resolution.
- Export as PDF (opens the print dialog: choose “Save as PDF”) creates a single page the exact size of the drawing. In your browser's print dialog, choose Save as PDF as the destination.
Both options are unavailable while the whiteboard is empty.
Whiteboard templates
Click Templates at the top right of Whiteboards to open Whiteboard templates. Click one to create a new whiteboard with its content; it's yours and you can change it like any other.
Built-in templates
Tylode comes with seven, with sample content to replace:
| Template | For | What's in it |
|---|---|---|
| Concept map | Students | A topic in the middle connected to four key ideas, each with a note for details or examples. |
| Weekly study plan | Students | A column per day with sample tasks and a color key: study, deadlines and exams, review and rest. |
| Group project | Students | The team and their roles, To do, In progress and Done columns, and the key dates. |
| Business model canvas | Freelancers | The nine blocks of the business model canvas, with an example in each. |
| Client pipeline | Freelancers | Columns from Lead to Invoiced and paid; each client is a note with its amount. |
| Project brief | Freelancers | Client and goal, deliverables, what's out of scope, timeline, budget and next steps. |
| Goals for the year | Personal | Six areas of your life with a goal in each, and what you're focusing on this month. |
Each template's name and description are shown in your language. The sample content is in Spanish if you use Tylode in Spanish, and in English in every other language.
Your own templates
Turn any whiteboard into a reusable starting point.
- Open the whiteboard, click ⋯ (More options) and choose Save as template. A Template badge appears next to the whiteboard's name.
- To start a new whiteboard from it, go to Whiteboard templates and click Use on the template, under Saved in this workspace. A new whiteboard is created with the same content.
Templates are listed only on Whiteboard templates, not in the main list. To turn a template back into a normal whiteboard, open it and choose ⋯ → Remove from templates, or click Remove on the templates page. Templates are shared with everyone in the workspace.
Whiteboards in pages
Type / in a page and choose Whiteboard. Pick one under Choose a whiteboard to embed here or click Create new whiteboard. The whiteboard is shown inside the page and can be used from there. See Blocks.
Access
By default, everyone in the workspace can see and edit a whiteboard. Click Access at the top of the whiteboard to restrict it to Only people I choose and give Can view or Can edit to specific people or teams. Only the whiteboard's creator and workspace admins can change access. See Access to boards, whiteboards and databases.
Limits by plan
| Free | Pro | Premium | |
|---|---|---|---|
| Whiteboards per workspace | 2 | 5 | Unlimited |
Templates don't count toward the limit. The limit uses your effective plan (the lower of your plan and the workspace's). In a frozen workspace whiteboards are read-only. See Plans.
API
With a Pro or Premium plan you can list whiteboards, create whiteboards and add sticky notes, text, rectangles and ellipses through the REST API or the MCP server. See Content API.